If you’re wondering how to wire marine electronics, this comprehensive guide will walk you through the essential steps, precautions, and best practices to ensure a safe and reliable installation.
What Are Marine Electronics?
Marine electronics refer to the variety of devices used on boats and yachts to enhance navigation, communication, and safety.
Common marine electronics include:
- GPS Devices: For accurate navigation.
- VHF Radios: For communication with other vessels and shore stations.
- Fish Finders: To locate fish and underwater structure.
- Chartplotters: For advanced navigation and route planning.
- Autopilots: To automate steering.
Understanding how to wire marine electronics properly can keep your equipment functioning correctly and prevent any mishaps while on the water.
Why Is Proper Wiring Essential?
Proper wiring is critical for several reasons:
- Safety: Incorrect wiring can lead to electrical fires or equipment failure.
- Reliability: Well-wired systems are less prone to issues and interruptions.
- Efficiency: Correctly installed electronics consume less power and enhance battery life.
- Compliance: Following maritime electrical standards ensures your setup meets safety regulations.
Now, let’s dive into the steps that will help you learn how to wire marine electronics safely and effectively.
What Tools Do You Need?
Before starting on how to wire marine electronics, gather the essential tools:
- Wire Strippers: For removing insulation from wires.
- Crimping Tool: To attach connectors to wires.
- Screwdrivers: For securing and unscrewing devices.
- Marine-Grade Wiring: To withstand the harsh marine environment.
- Heat Shrink Tubing: For insulating and securing wire connections.
- Multimeter: For testing connections and ensuring everything is functional.
- Electrical Tape: For additional insulation and securing wires.
How Should You Prepare Your Workspace?
Preparation is key when learning how to wire marine electronics. Follow these steps to set up an effective workspace:
-
Choose a Dry Location: Ensure your workspace is dry to prevent electrical shorts.
-
Clear the Area: Remove any unnecessary items. Having a clutter-free workspace will help you focus.
-
Organize Your Tools: Gather all necessary tools and materials beforehand so that you won’t need to search for them mid-project.
-
Label Everything: It’s a good practice to label wires and devices to prevent confusion during the installation.
How Do You Plan the Wiring Layout?
Planning your wiring layout is crucial when figuring out how to wire marine electronics effectively. Here’s how to do it:
-
Trace Existing Wiring: If you are replacing old electronics, map out the current wiring layout.
-
Create a Wiring Diagram: Draw a diagram of how you want the new wiring to be set up. This diagram will help guide you.
-
Consider Accessibility: Ensure that wiring is accessible for future maintenance and inspections.
-
Follow Manufacturer Recommendations: Always refer to the installation manuals of the electronic devices, as they often provide specific wiring instructions.
How Do You Choose the Right Marine-Grade Wire?
Selecting the right wire is vital for safety and performance in marine conditions. Here’s what you should consider:
-
Stranded vs. Solid Wire: Prefer stranded wire for flexibility and ease of installation, especially in tight spaces.
-
Gauge Size: Ensure the wire gauge is appropriate for the amount of current the devices will draw. Generally, a lower gauge number indicates a thicker wire that can handle higher currents.
-
Insulation Rating: Check that the wire is suitable for marine use, typically featuring a tinned copper conductor and insulation that can withstand moisture.
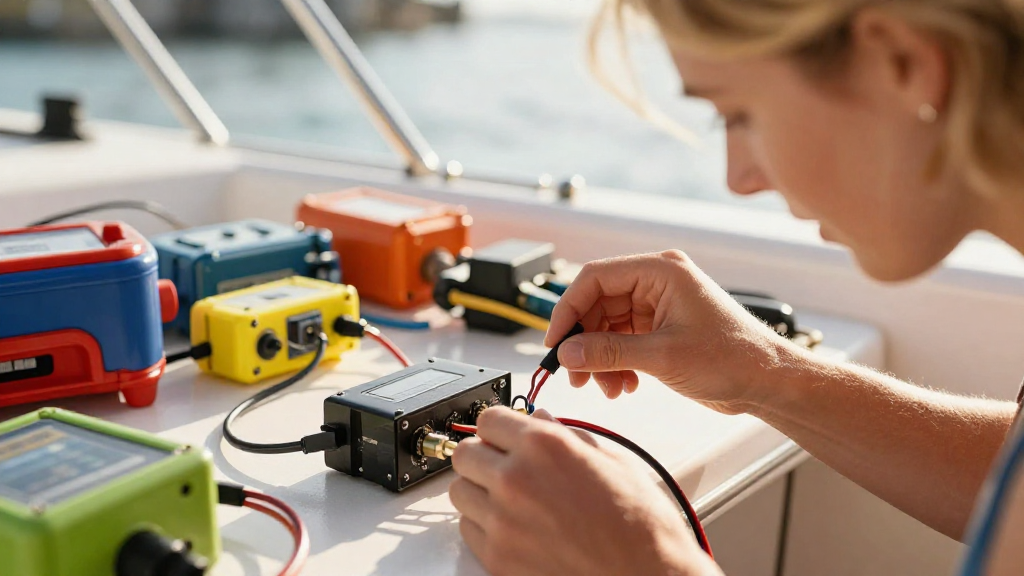
How Do You Make Safe Connections?
When learning how to wire marine electronics, making safe connections is paramount:
1. Strip the Wire
Using wire strippers, remove about 1/2 inch of insulation from the ends of each wire that needs to be connected.
2. Twist-on Connectors
-
Crimp Connectors: Use a crimping tool to attach connectors, ensuring a good, secure fit.
-
Screw Terminals: If using screw terminals, wrap the wire around the terminal and secure it tightly.
3. Solder Connections
For a more permanent and watertight connection:
– Heat the wire ends and apply solder.
– Cover with heat shrink tubing and heat it to seal.
4. Insulate
Always use electrical tape or heat shrink tubing to insulate connections and reduce the risk of shorts.
What Are the Best Practices for Wiring?
Implement these best practices when you’re looking into how to wire marine electronics:
-
Avoid Overloading Circuits: Ensure that the combined load of all devices does not exceed the circuit’s rating.
-
Use Fuses: Install a fuse in-line with the power supply to protect against overcurrent.
-
Keep Connections Dry: Seal all connections and junctions from moisture to prevent corrosion.
-
Cable Management: Use cable ties and clips to keep wires organized and minimize wear and tear.
How Do You Test the Wiring?
Once you’ve completed your wiring, it’s essential to test everything before taking your boat out:
-
Use a Multimeter: Check for continuity and ensure all connections are secure.
-
Power Up Devices: Turn on each electronic device one by one to ensure they function correctly.
-
Check Connections: Pay attention to any sparks, overheating, or unusual smells, as these could indicate a problem.
What Should You Do After Installation?
After successful installation and testing of your marine electronics, keep the following in mind:
-
Documentation: Maintain records of your wiring diagrams and any modifications made.
-
Routine Maintenance: Regularly check the connections and wiring for wear and corrosion.
-
Seek Professional Help: If you’re unsure at any step, consider consulting a marine electrician to ensure safety and compliance.
Conclusion
Learning how to wire marine electronics comes with responsibility, but it’s a skill worth mastering for any boat owner.
By following the steps outlined in this guide, you can ensure that your wiring is safe, reliable, and compliant with maritime standards.
With careful planning, the right tools, and diligent execution, you’ll be well on your way to enhancing your marine experience with reliable electronics. Always prioritize safety, be meticulous in execution, and, when in doubt, don’t hesitate to seek professional assistance.
By following these guidelines, you will not only enhance the performance of your marine equipment but also ensure that every journey on the water is safe and enjoyable.